
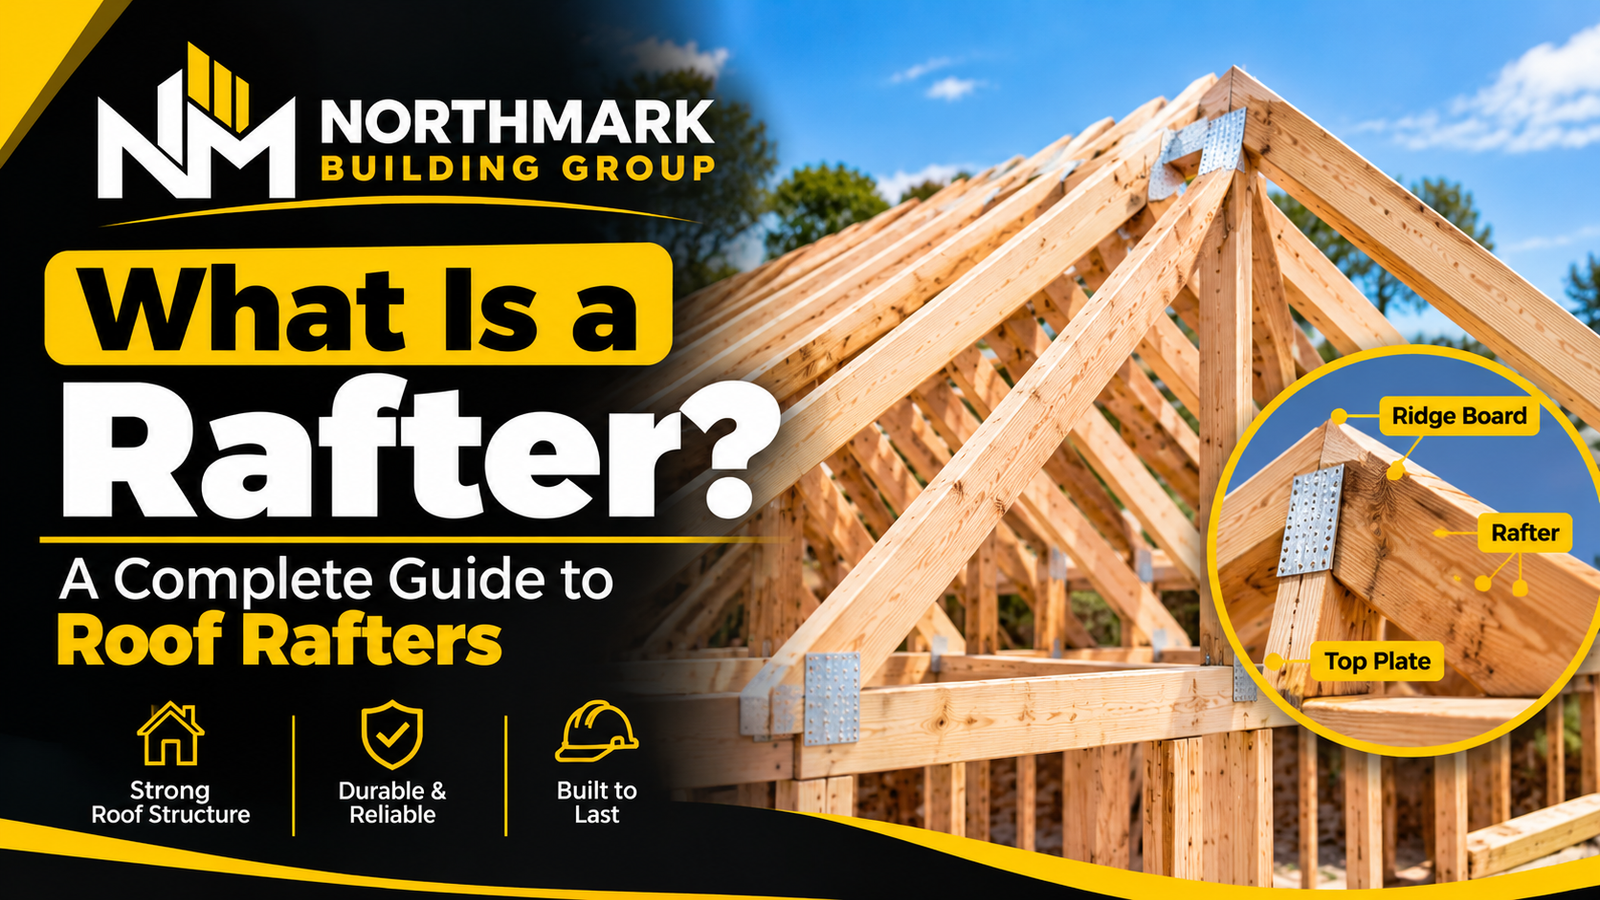
What Is a Rafter? A Complete Guide to Roof Rafters
A rafter is a sloping structural member that runs from the top of a wall up to the ridge of a pitched roof. Rafters form the roof’s slope. They carry the roof battens and roof covering, and they pass the roof’s loads down to the walls below.
If you picture the timber skeleton of a pitched roof, the rafters are the long sloping pieces. In most conventional roofs, they work in opposing pairs that meet at the top. This guide explains how rafters work, what they are made of, the main types, and how they differ from trusses, joists and beams. It is general information only. Every roof needs project-specific design.
How does a roof rafter work?
A rafter does three jobs at once.
- It sets the roof shape. Rafters give the roof its pitch, or angle.
- It supports the roof covering. Battens or purlins fix across the rafters. Tiles or metal sheets then fix to those.
- It transfers load. Weight, wind and other forces travel along the rafter into the supporting walls.
The RMIT BuildRight guide to conventional roof framing describes rafters as members fixed on a slope, generally in opposing pairs that meet at the ridge.
A simple example
Take a typical gabled house. Two walls run the length of the house. A rafter on each side rises from the top plate of one wall to the ridge. The pair forms an inverted V. Repeat that along the roof at set intervals, and you have the main roof frame.
When a pair pushes down, it also tries to push the walls outward. Something must resist that. In a conventional roof, ceiling joists or rafter ties usually hold the bottoms of the rafters together. Collar ties, struts and underpurlins add further support depending on the design.
Wind and uplift
Wind does not only push down. It can lift a roof. For that reason, each rafter must connect firmly to the wall below, and the wall must connect to the rest of the frame. Tie-down requirements depend on the wind classification of the site. Your engineer or designer specifies them.
Main parts of a rafter and the roof framing system
People often call every piece of roof timber a rafter. That is not correct. Here is how the pieces differ.
Parts of the rafter itself
- Rafter tail: the lower end that extends past the wall to form the eaves overhang.
- Birdsmouth cut: a notch cut into the underside of the rafter so it sits on the top plate. The RMIT guide notes that a birdsmouth should not exceed one third of the rafter depth. Check your current standard and design for the exact rule that applies to you.
- Ridge end: the top end, which meets the ridge member. It usually has an angled plumb cut.
Framing members connected to the rafter
- Ridge board: a non-structural member that rafters fix against at the top. It helps with alignment and fixing. It does not carry load between the rafters.
- Ridge beam: a structural beam that supports the rafters at the top. It carries load and needs its own support and sizing.
- Fascia: a board fixed across the rafter tails. It finishes the eaves and carries the gutter.
- Collar ties: horizontal ties joining opposite rafters, usually in the upper part of the roof.
- Rafter ties and ceiling joists: members that hold the bottom of opposing rafters together.
Supporting elements of the wider roof system
- Top plate or wall plate: the horizontal timber on top of the wall that rafters bear on.
- Underpurlins: horizontal members under the rafters, running parallel to the ridge. They reduce the rafter’s effective span.
- Struts: props that carry underpurlin loads down to a wall or beam.
- Blocking and bracing: timber pieces that stop twisting and add stiffness.
- Connectors and tie-down fixings: straps, bolts, nails and brackets specified to resist wind and keep the roof attached.
Common types of roof rafters
1. Common rafters
Common rafters run from the top plate to the ridge, square to both. They form the main roof slope and are the most widely used type.
2. Hip rafters
A hip rafter runs along the external corner where two roof slopes meet. It slopes down from the ridge (or a high point) to the corner of the building.
3. Valley rafters
A valley rafter runs along an internal corner, where two slopes meet and form a channel. Water flows down this line, so it needs good detailing.
4. Jack rafters
Jack rafters are short rafters. They run from a hip or valley rafter to either the ridge or the wall plate, depending on the layout. One end of a jack rafter does not reach the ridge or plate. It stops against the hip or valley.
5. Creeper rafters
In many regions, “creeper” is another name for a jack rafter that runs between a hip or valley and the wall plate. Terminology varies, so check how your drawings label them.
6. Principal rafters
Principal rafters are heavier rafters used in traditional and some structural roof arrangements, often supporting purlins. They are not the same as common rafters. Most Australian residential roofs do not use them.
What are rafters made of?
| Material | Typical use | Strengths | Limits to consider |
|---|---|---|---|
| Solid structural timber | Most Australian residential roofs | Familiar, easy to cut and fix on site | Size and grade limit span |
| Engineered timber (such as LVL) | Longer spans, ridge beams, heavier loads | Consistent strength, longer lengths | Needs manufacturer design data |
| Steel | Commercial buildings, long spans, special designs | High strength, long spans | Heavier, different fixing methods |
Solid structural timber is the usual choice for residential rafters. Its species and stress grade matter. A rafter of the same size can perform very differently in a different grade. Always match the timber to the specification.
What is rafter spacing?
Rafter spacing is the distance between one rafter and the next. Designers usually measure it from centre to centre.
Consistent spacing matters because the roof battens or purlins span between the rafters. Spacing also decides how much load each rafter carries. Closer spacing means less load per rafter. Wider spacing means more.
No single spacing suits every roof. The right spacing depends on:
- the roof covering and its weight
- the timber size, species and grade
- the span
- the roof pitch
- the wind classification
- the batten or purlin size
Your structural drawings and the relevant span tables in AS 1684 set the correct arrangement. Do not copy a spacing from another house.
How far can a rafter span?
Span is the distance a rafter crosses between supports. A single span runs between two supports, such as the ridge and the wall plate. A continuous span runs over an intermediate support. An underpurlin is a common example. The RMIT guide shows both arrangements.
There is no universal maximum span. Allowable span depends on:
- timber species and stress grade
- rafter depth and thickness
- roof pitch
- rafter spacing
- dead loads (the roof’s own weight) and imposed loads
- wind classification
- whether underpurlins and struts reduce the span
AS 1684 span tables bring these factors together for typical residential roofs. Roofs outside the standard’s limits need engineering design.
How are roof rafters installed?
This overview is educational. Roof framing should be done by experienced carpenters, working to approved plans and with proper fall protection.
- Review the drawings. Check architectural and structural plans for rafter size, spacing and details.
- Check dimensions and set out. Confirm the frame is square and level. Mark the rafter positions.
- Prepare the wall plates. Make sure the plates are straight, fixed and ready to receive the rafters.
- Confirm the ridge arrangement. Identify whether the design uses a ridge board or a structural ridge beam.
- Measure and cut. Cut the rafters to the design, including the plumb cut at the ridge and the birdsmouth.
- Check bearing details. Make sure each rafter bears properly where specified.
- Position and fix. Erect rafters in pairs and fix them as specified.
- Install ties, purlins, struts and bracing. These make the roof stable.
- Complete connections and tie-downs. Fix the specified straps and bolts.
- Check alignment and stability. Confirm the frame is straight and properly braced before the roof covering goes on.
Accurate setting out is the key. A small error at the ridge repeats along the whole roof.